All I can say is I laughed so hard once I saw this I had to repost it.
Wednesday, May 21, 2008
Monday, April 7, 2008
Star Wars from Work
Apparently I have nothing to do so I decided to watch Star Wars at work. If you have never seen this it's one of the best ASCII animations I have seen.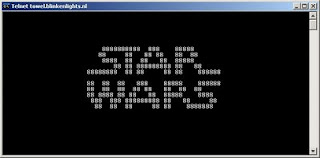
To get to this site you will need to have a telnet application. If you have XP you can
- Open a Command Prompt windows (Start>Run> type "cmd")
- On the open Command Prompt windows just type "TELNET" without the quotes and press enter
- Then type "o" (the Letter O not the number) and press enter
- After that, type "towel.blinkenlights.nl" again without the quotes and press enter
- Then wait for Star Wars to entertain you.
Posted by Steele Smith at 3:17 PM 0 comments
Sunday, April 6, 2008
Rear Logic Electronics
I started working on my rear logic boards. I got this board from Leon B, in Belgium and really lucked out in him having some on hand. No waiting! I really don't need this board for my current droid build since R5 doesn't use it, but the plan is to have swappable (sp?) droid heads to switch back and forth at some point.
Here is the page of Leon's that has his tutorial: Back Logic Display Tutorial
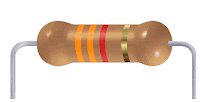
Couple of things I noticed, he doesn't really provide alot of documentation about what resistors you should use when actually completing the board. After quite a bit of searching and rereading the R2Builders message boards I determined that they should be 3.3KOhm. It's been twenty years since I memorized the resistor color codes so some simple lookups on the web were in order. The color codes on this are Orange, Orange, Red, Gold.
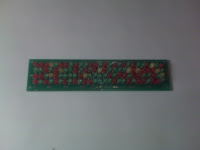
I didn't use a bezel to align my LED's but just freehanded everything. I wasn't to concerned over it since I intended to use fiber to a bezel and didn't need a perfect alignment. Either way they ended up nice in my opinion. The finished LED part seems nice. I really liked Leon's pcb board. Very tight, and fairly easy to work with.
I did actually start to use a bezel that I had laying around from the A&A skins. Unfortunately I seemed to be one row short but it did give me and idea on how to align them nicely.
Digging about in the same drawer with the resistors I located an old hdd cable. I very carefully cut off a ribbon to use to connect it to the PIC flasher. I haven't connected it yet, I'll do that once the resistors are in place.
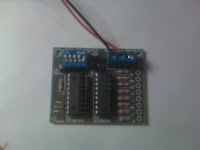
If you are using the PIC flasher from Carl's electronics, do not include the resistors on that board. I built the PIC flasher a long time ago and just added them automatically. As you can see the on the PIC flasher on the right, the resistors need to come out. Unfortunately, I think this flasher has a bad chip which apparantly they have been notoriously sent out with. I'll be contacting Carl's to ask for a replacement.
Total time for this buildout was something along the lines of 3.5 hours.
Heres the links to additional information :
- Graphical Resistance Calculator
- Back Logic Display Tutorial (ordering information is here as well.)
- PIC LED Flasher Part CK1007
- Soldering Work Station - If you don't already have one I picked up this inexpensive dual power station from radio shack and really recommend it for a low-cost solution.
Posted by Steele Smith at 8:11 PM 1 comments
Labels: dome, electronics, Rear Logics
Monday, February 25, 2008
Center Vents - Sanding
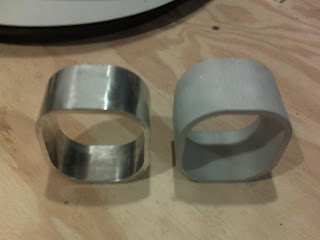 I ordered some center vents from TomD for R2. They came with a sandblasted appearance. I really want my R2 to be a factory new shiny R2.
I will say this, the vents that TomD manufactured are fantastic. Everything came together quite well.
You can take a look at the comparison of the original vent on the right and the vent that has been sanded on the left.
Being my first aluminum part I have ever worked with I wasn't sure of the best way to get this working.
Here's my list of materials for the sanding process:
- Dremel tool (Lowes)
- 320 Grit sanding discs for dremel (Home Depot)
- Dremel Sanding Scrubby thingy... (I'll have to post a picture) this things was next to useless though. (Home Depot)
- 600 grit sanding paper. (Ace Hardware)
- 800 grit sanding paper. (Ace Hardware)
- 1500 grit sanding paper. (Ace Hardware)
- Mother's Aluminum polish (Walmart automotive aisle)
Once the first pass was completed I initially tried to use the sanding paper but it didn't seem to work out as well so I ended up cutting strips of it off and then creating duplicates of the sanding discs. Using the polishing pieces to give it some strength I attached that to the dremel working all the way up to the 1500 grit. I think ended up sanding for a little over four hours in total for one vent including the louvers.
Posted by Steele Smith at 5:26 PM 0 comments
Labels: Center Vents, CVWL, R2
